
Moto G 5G Swollen Battery Replacement
- Symptom
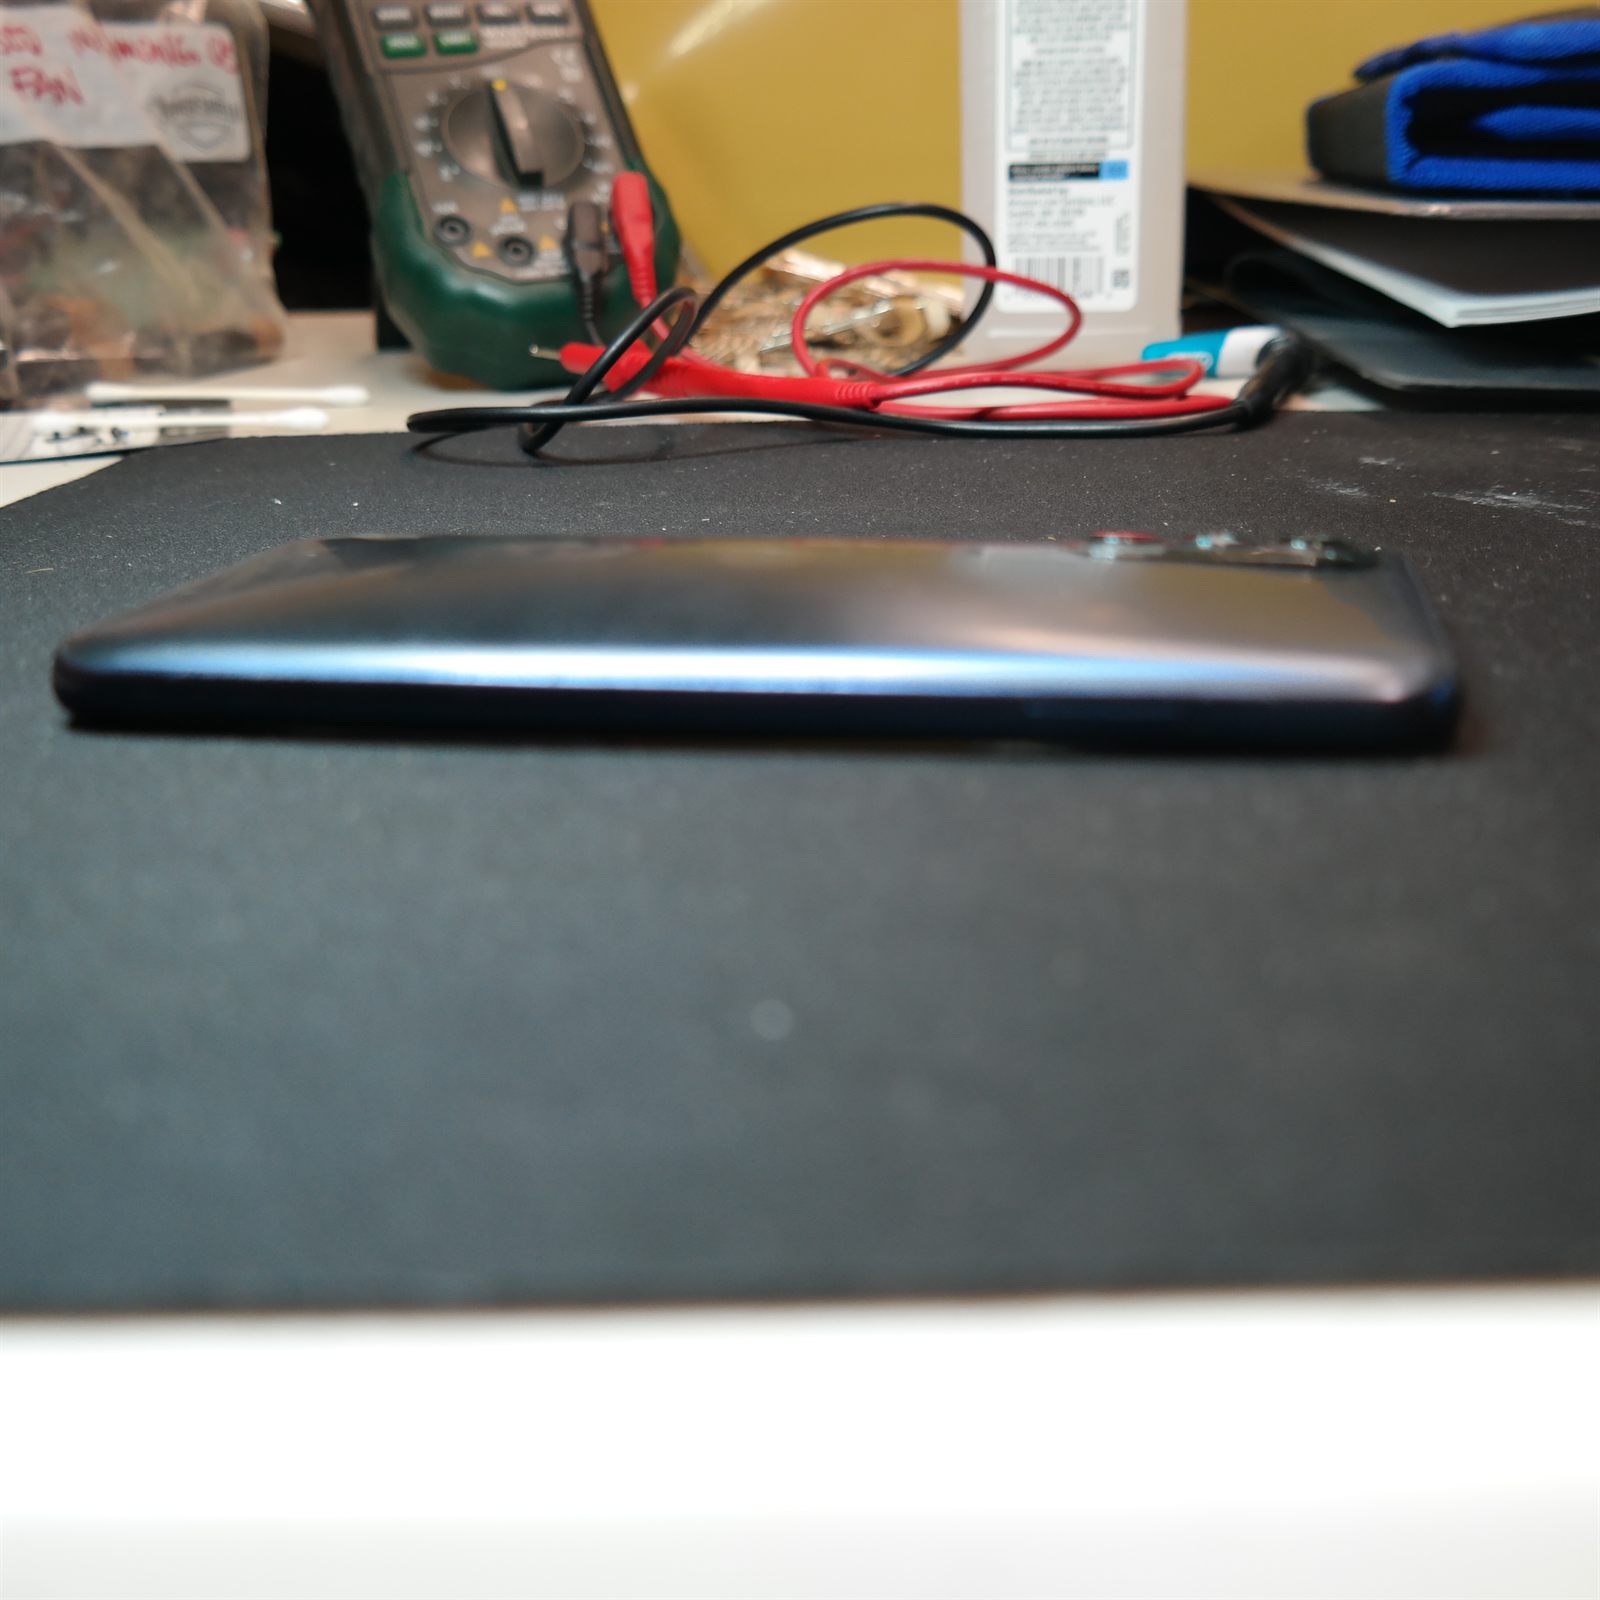
- The rear cover of a Moto G 5G (2022) was lifting away from the frame along one side. The separation was getting worse, and neither the cover nor its retaining clips were broken.
- Diagnosis
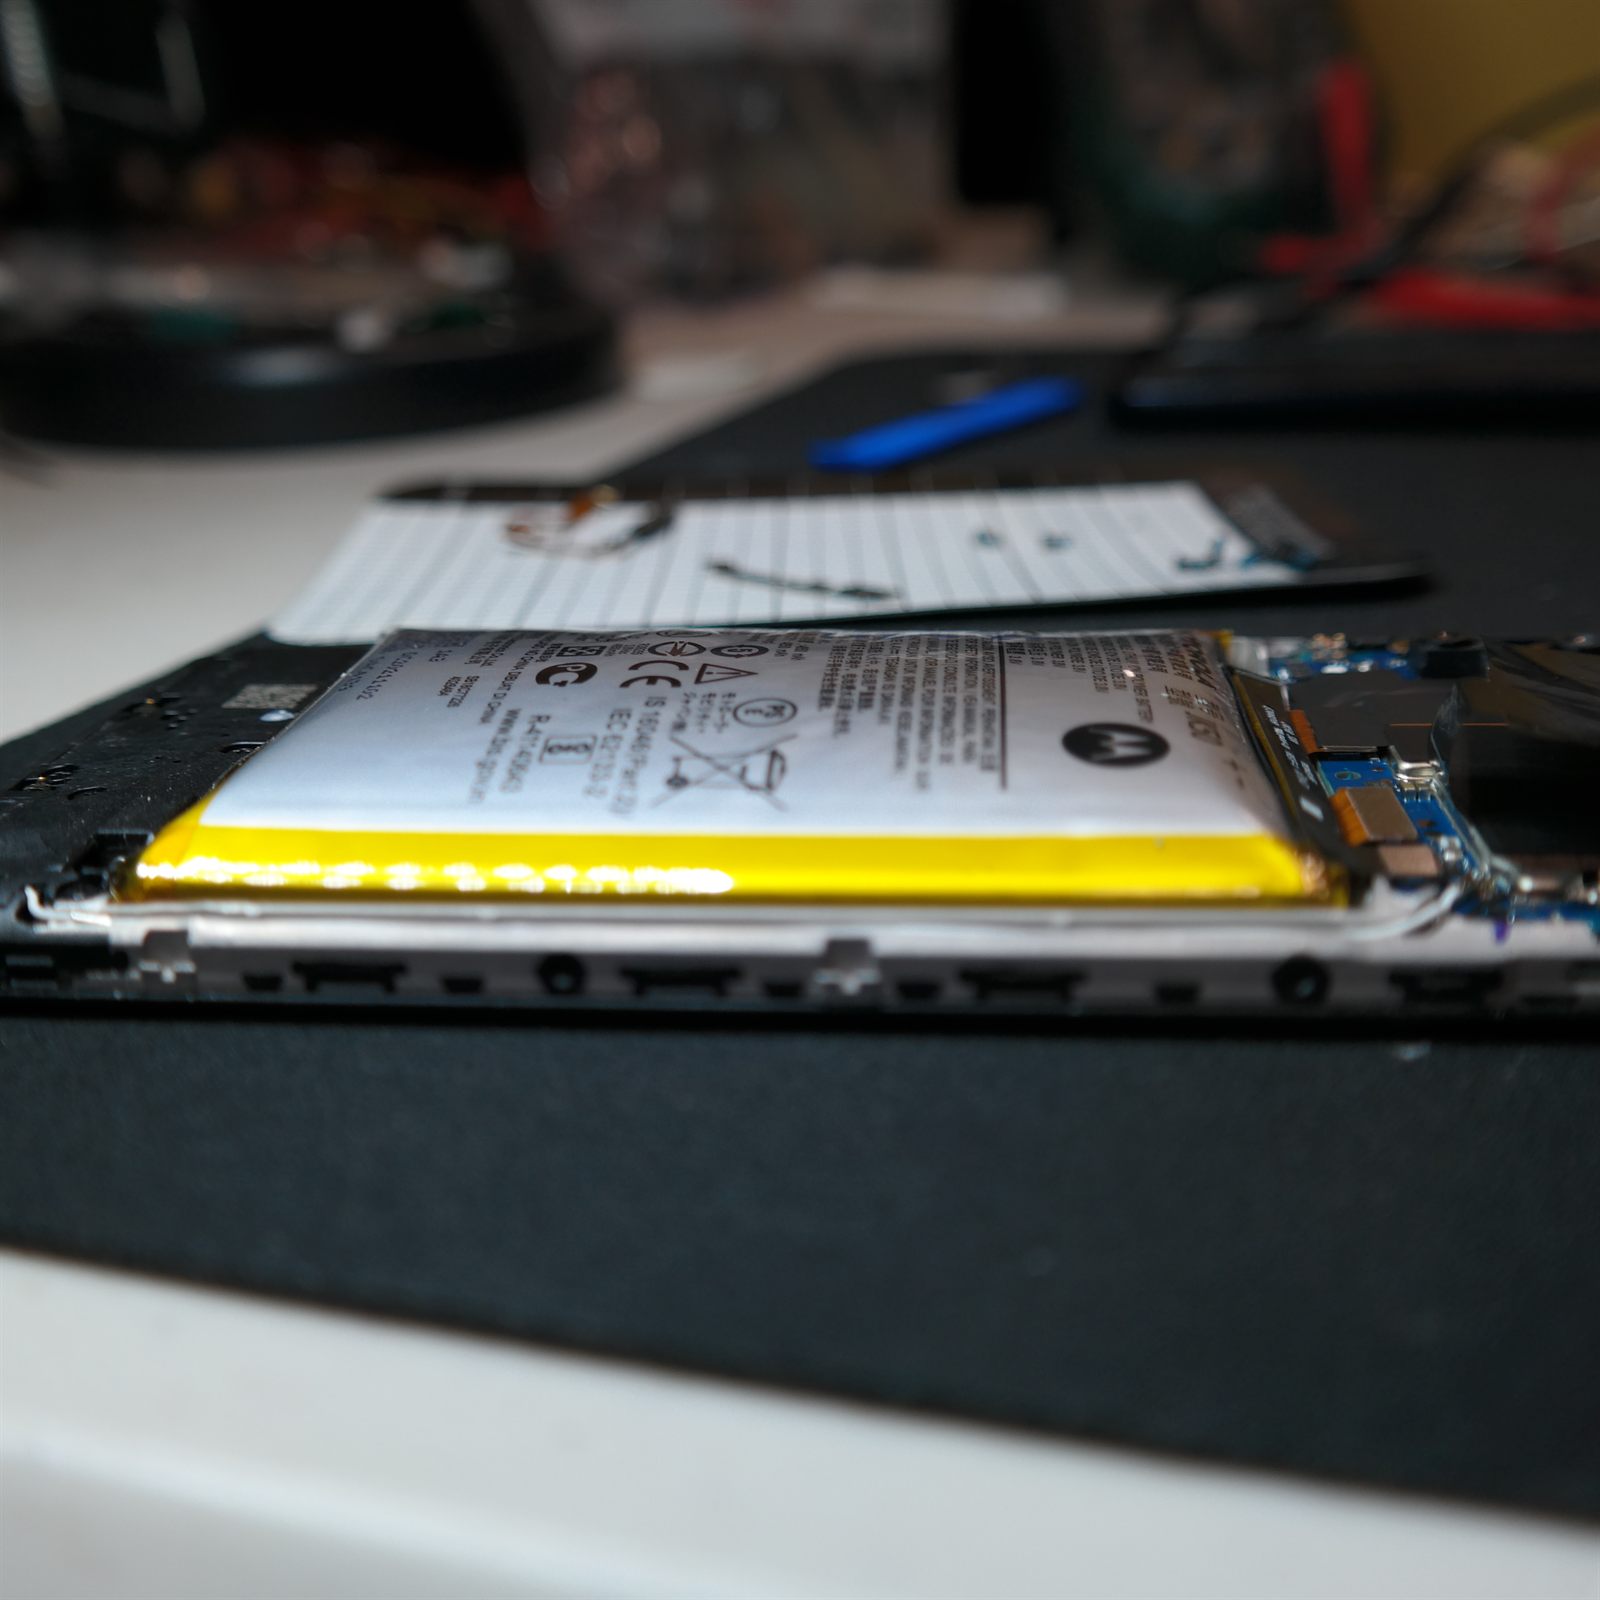
- Identified as a Moto G 5G (2022), model family XT2213. Inside, the original JK50 lithium-ion battery had failed and expanded far enough to push the rear cover outward from within.
- Fix
- Opened the phone at the rear-cover seam, controlled the still-attached power-button cable, disconnected the battery, and released the swollen cell from its adhesive without puncturing or sharply bending it. A genuine Motorola JK50 replacement went in, followed by reassembly and a successful power-on test.
The back cover on this Moto G 5G had started pulling away from the frame. It was not a loose clip and it was not worn-out adhesive. The original battery had swollen into a rounded pouch and was pushing the phone apart from the inside. Once a lithium cell starts expanding, continuing to use or charge the device isn't worth the risk, so the job was to identify the exact phone and battery, reach the failed cell without damaging what sits around it, remove it intact, and verify the phone afterward.
What This Page Is For
A battery replacement sounds like a simple parts swap. A swollen battery changes the job. The cell is glued into the phone, it is already under mechanical stress, and it is surrounded by cables and components that are easy to damage. On this model, even removing the back cover exposes a second hazard: the power-button cable stays attached between the cover and the phone.
This write-up shows the work between "the battery is swollen" and "the phone turns on again." That means identifying the right replacement, opening the correct seam, controlling the attached cable, disconnecting power, releasing the old battery without puncturing it, and testing the result.
The Long Version
From a Lifting Cover to a Working Phone
What follows is the job as it ran: what the symptom actually meant, how the phone and the part were identified, the two places this repair can go wrong, and the test at the end. Skip to the result if you'd rather not read the whole thing.
The Back Cover Wasn't the Problem
The visible symptom was a widening gap along the side of the phone. From the outside that can look like a cover which simply needs snapping back into place. Pressing it closed would only have put more force on the failed battery.
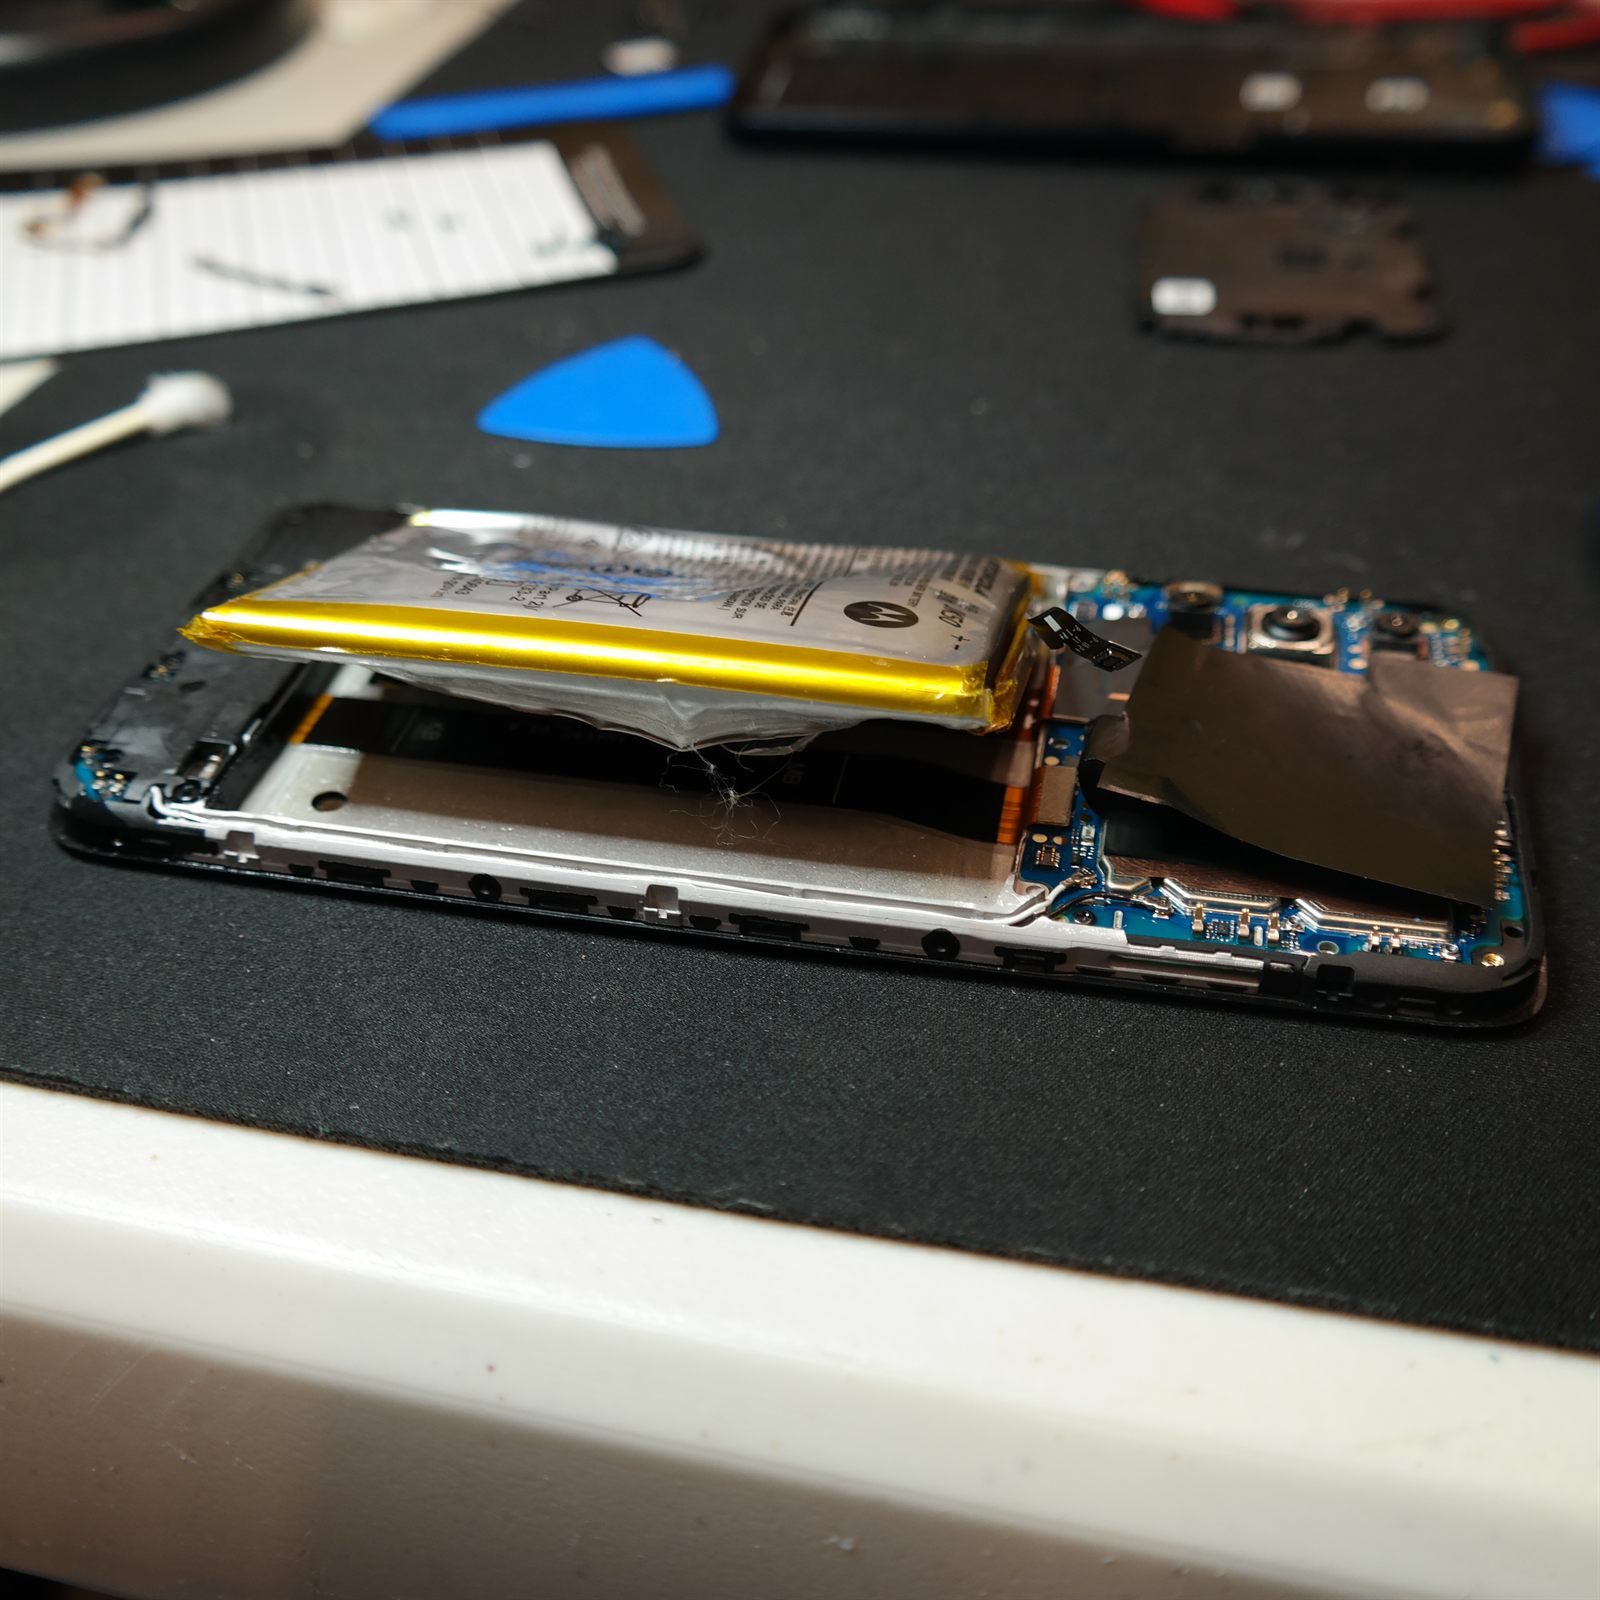
Once the phone was open and the internal cover was off, the diagnosis was unmistakable. The original cell was no longer flat. Its pouch had expanded into a pronounced curve, standing well above the chassis rail that is supposed to contain it.
Identifying the Phone and the Replacement
"Motorola Moto G" is not specific enough to order a battery. Motorola has used similar names across several generations, and the JK50 designation turns up in more than one product listing.
This phone was identified as a Moto G 5G (2022) from the XT2213 model family, and that identification was checked against the replacement battery's compatibility before the phone was opened. The cell that came out carries a DC20211102 date code and a rated capacity of 4850 mAh at 3.85 V, which is what a factory-original pack in a 2022 phone should look like.
The replacement used here was a genuine Motorola JK50. On a job that requires opening most of the phone and handling an already damaged lithium cell, saving a few dollars on an unknown battery is not a useful trade. Parts are billed at what we pay, including any shipping, and the price is told to the customer before anything is ordered.
Opening It Without Creating a Second Repair
The Moto G 5G has two visible seams around its edge. One separates the display from the frame. The other is the clipped seam between the plastic rear cover and the rest of the phone. Starting in the wrong seam turns a battery job into a display replacement, and iFixit's guide for this model calls that out explicitly: don't pry where the screen meets the frame.
After removing the SIM tray, the clips at the rear-cover seam were released with plastic opening tools. The cover then had to be opened like a book rather than pulled away, because its power-button cable was still attached to the phone.
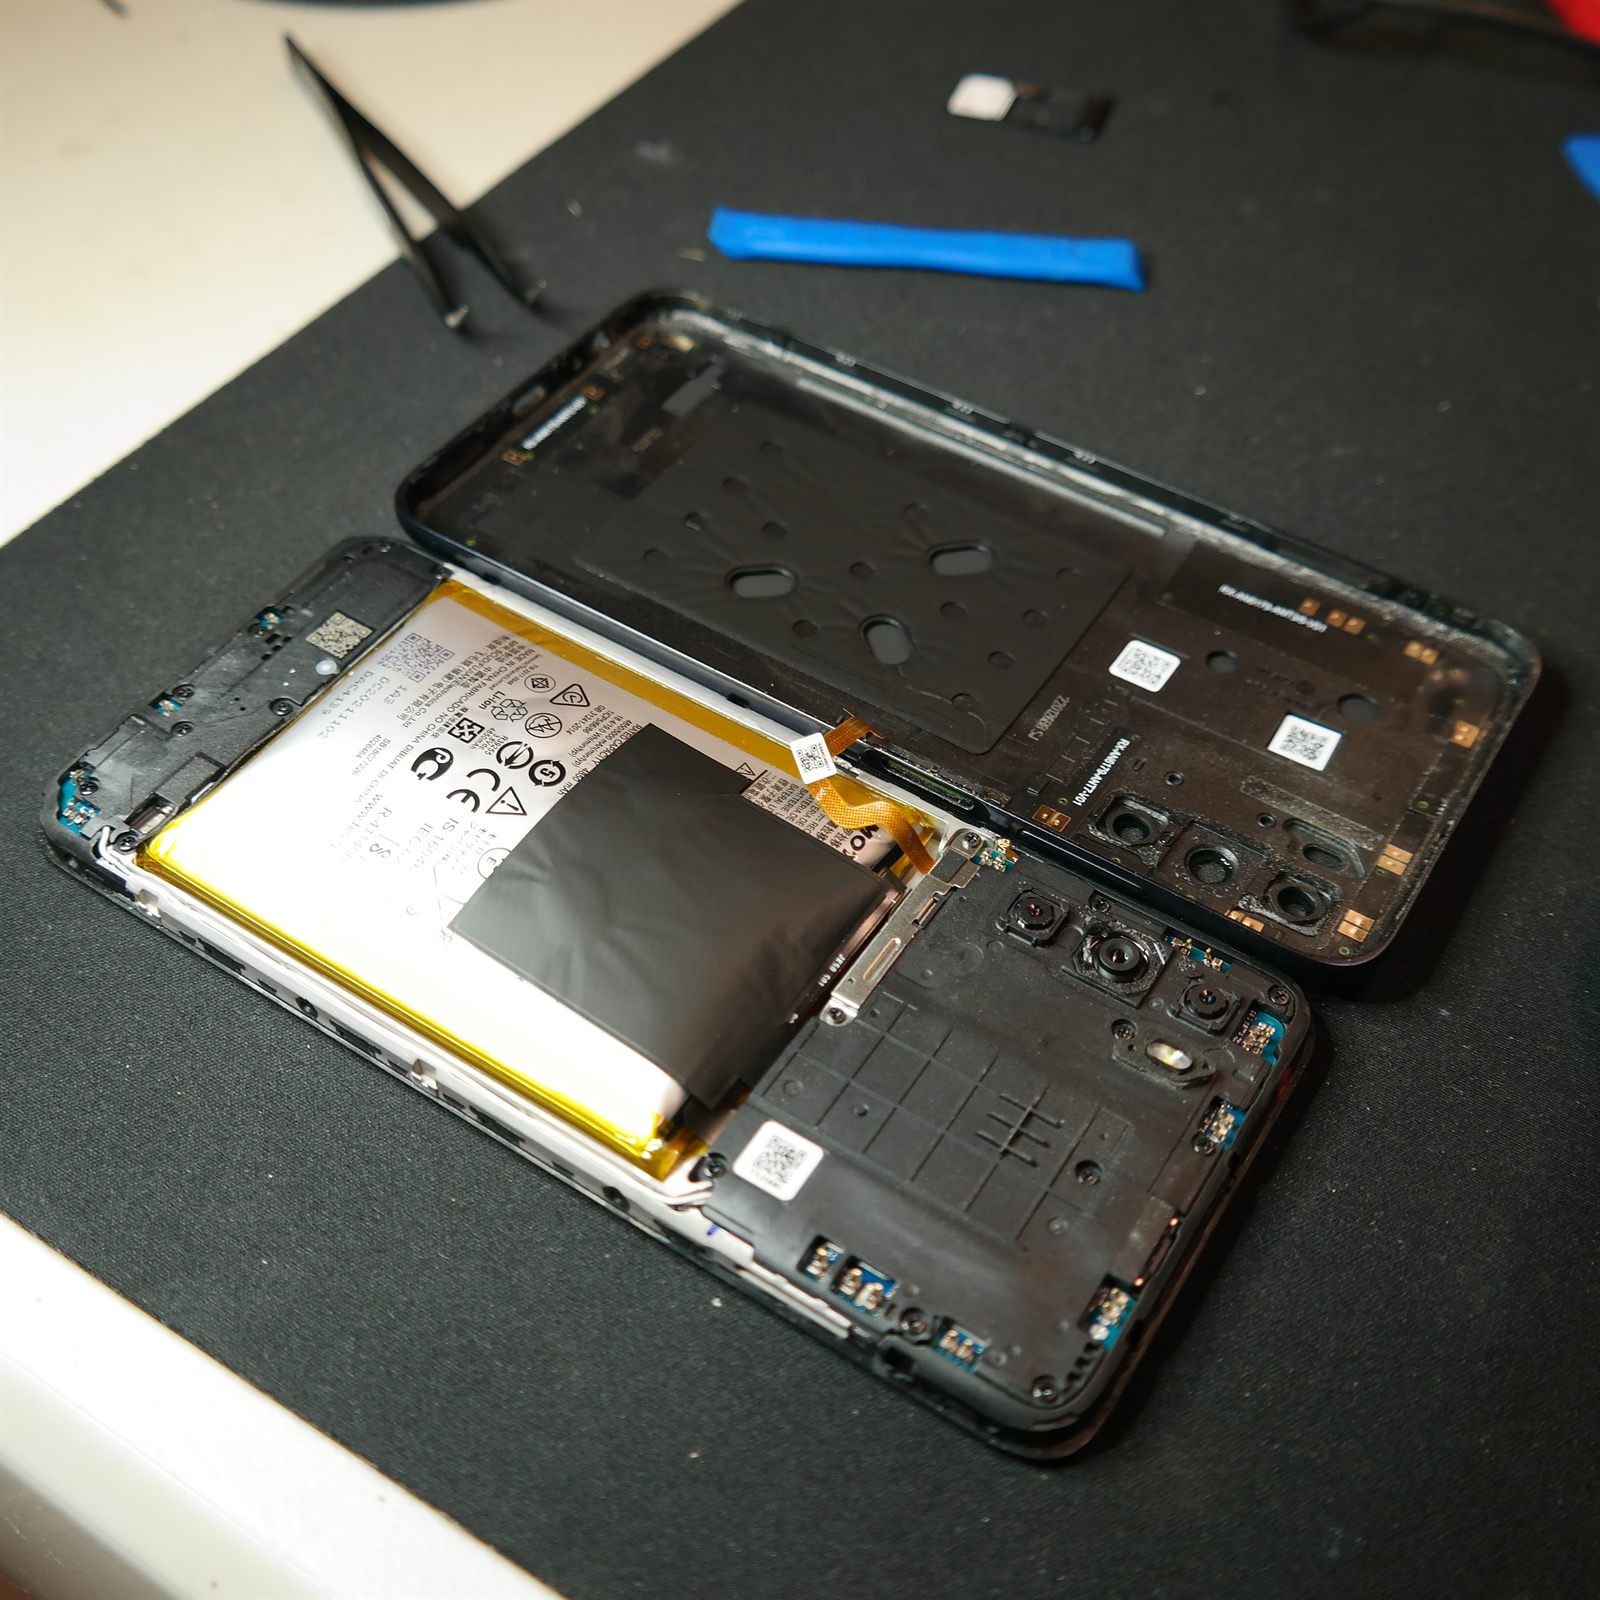
The button, its small bracket and its press connector came out deliberately and were kept organized with their screws. Only then could the rear cover be separated completely.
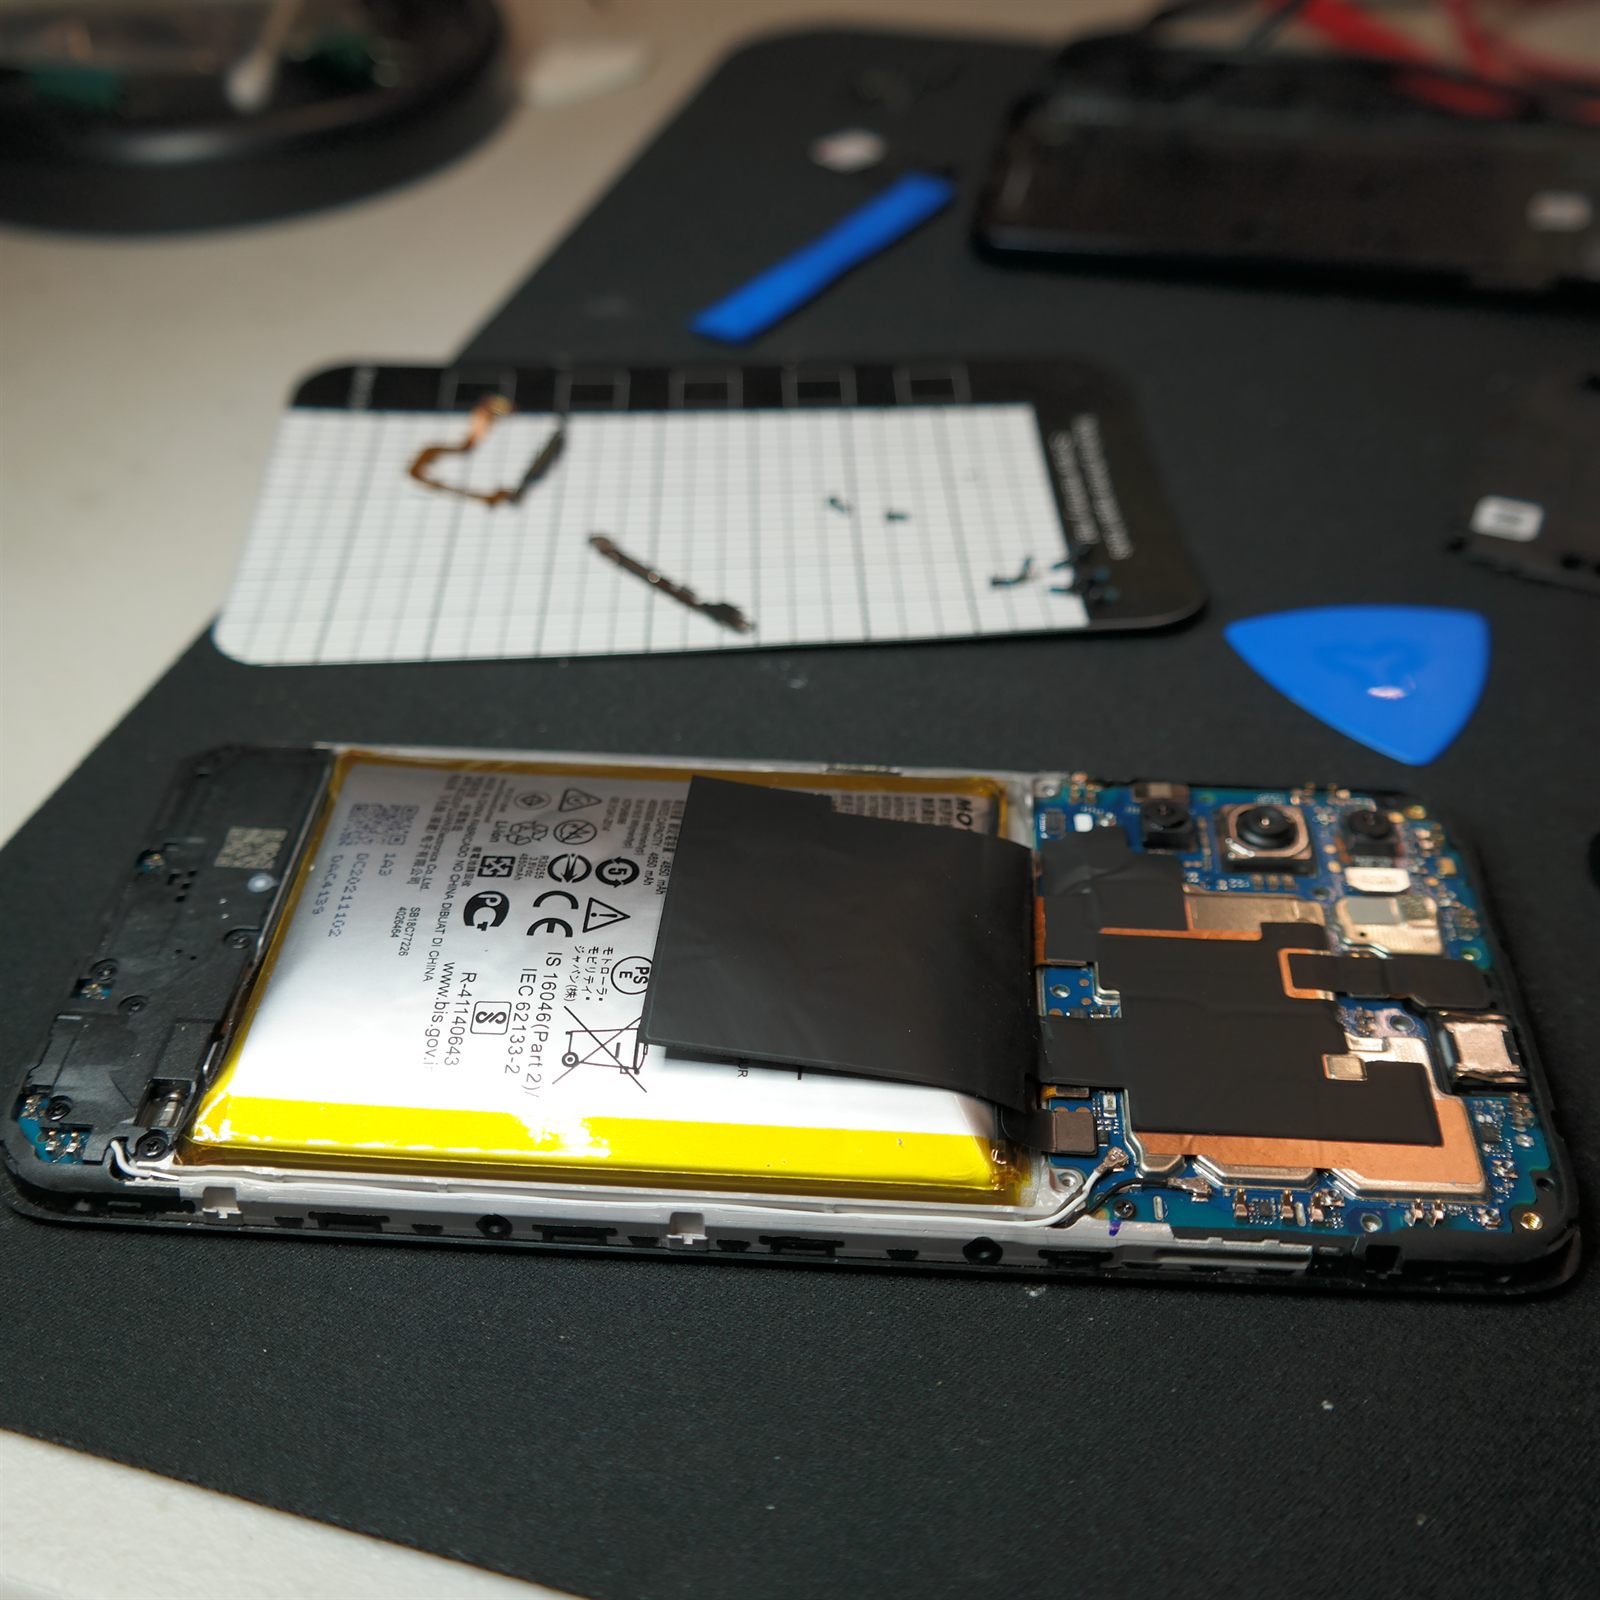
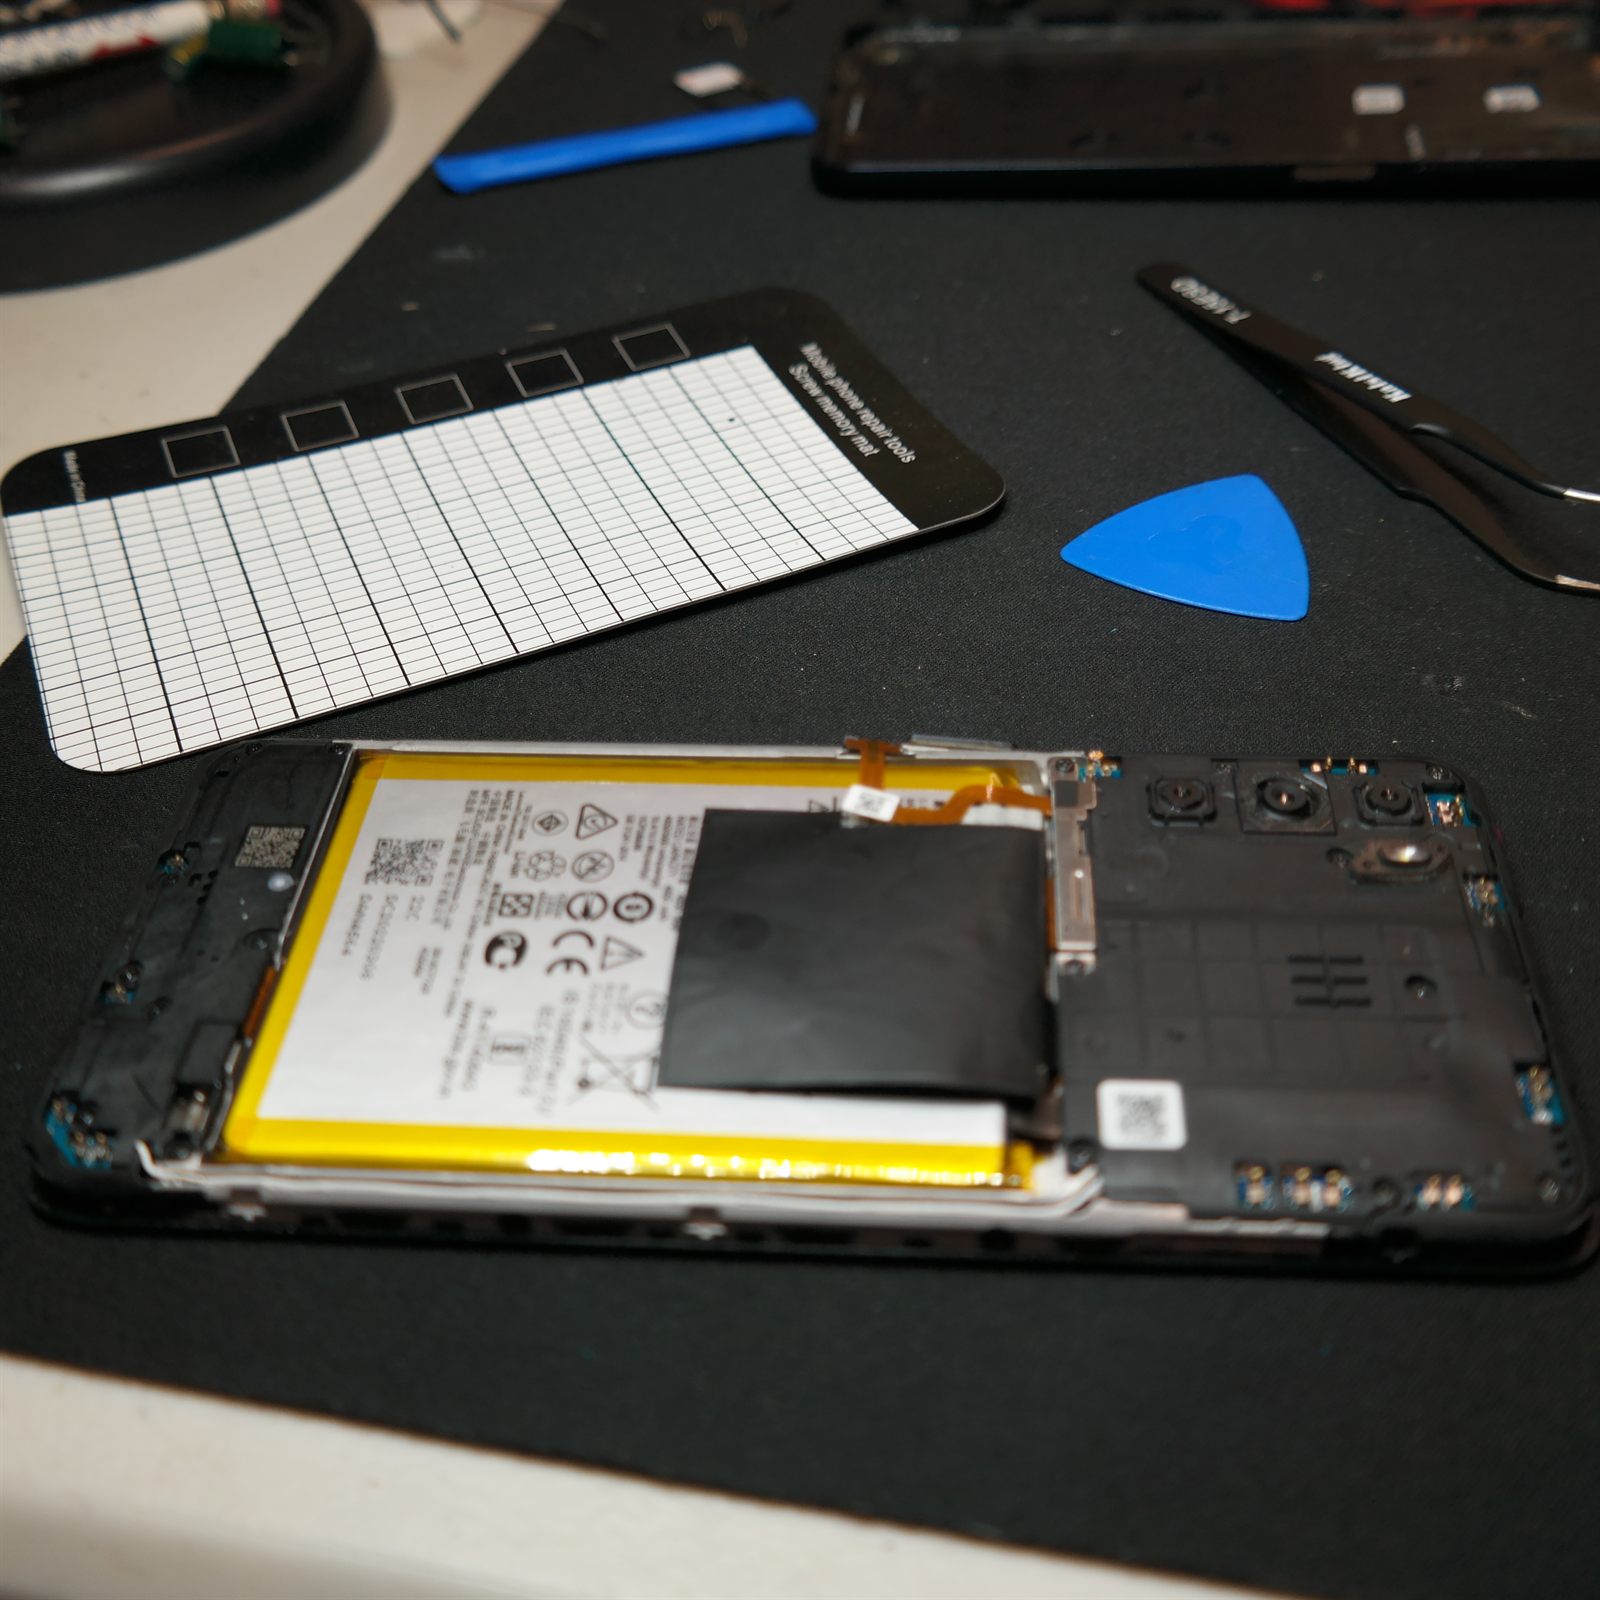
The motherboard cover came off next, exposing the battery connector. The battery was disconnected before any work started on the adhesive holding the cell down. That order is not a preference. Working on a damaged lithium pouch that is still electrically connected is how a bad afternoon becomes a fire.
Removing the Swollen Battery
The battery was held to the chassis by a broad adhesive sheet. That adhesive is strong enough to make impatience the main hazard in this repair.
A swollen pouch cell should not be stabbed, creased, crushed or levered out with anything metal. This one was worked free gradually with plastic tools and controlled, steady pressure. When the adhesive resisted, the answer was more time, not more force, which is the same thing iFixit's guide says in its own words: slow, consistent pressure is all that is required. The old cell came out without being pierced, and the battery bay and the components around it were inspected before anything new went in.
Installing the Replacement
With the old adhesive cleared and the mounting area prepared, the genuine replacement JK50 was seated flat in the chassis and connected to the main board.
The internal cover, the power-button connection and bracket, the rear cover and the SIM tray then went back in the reverse order. Small press-fit connectors were aligned before any pressure was applied. They should click into place without being forced, and a connector that fights back is telling you it isn't lined up.
The Result
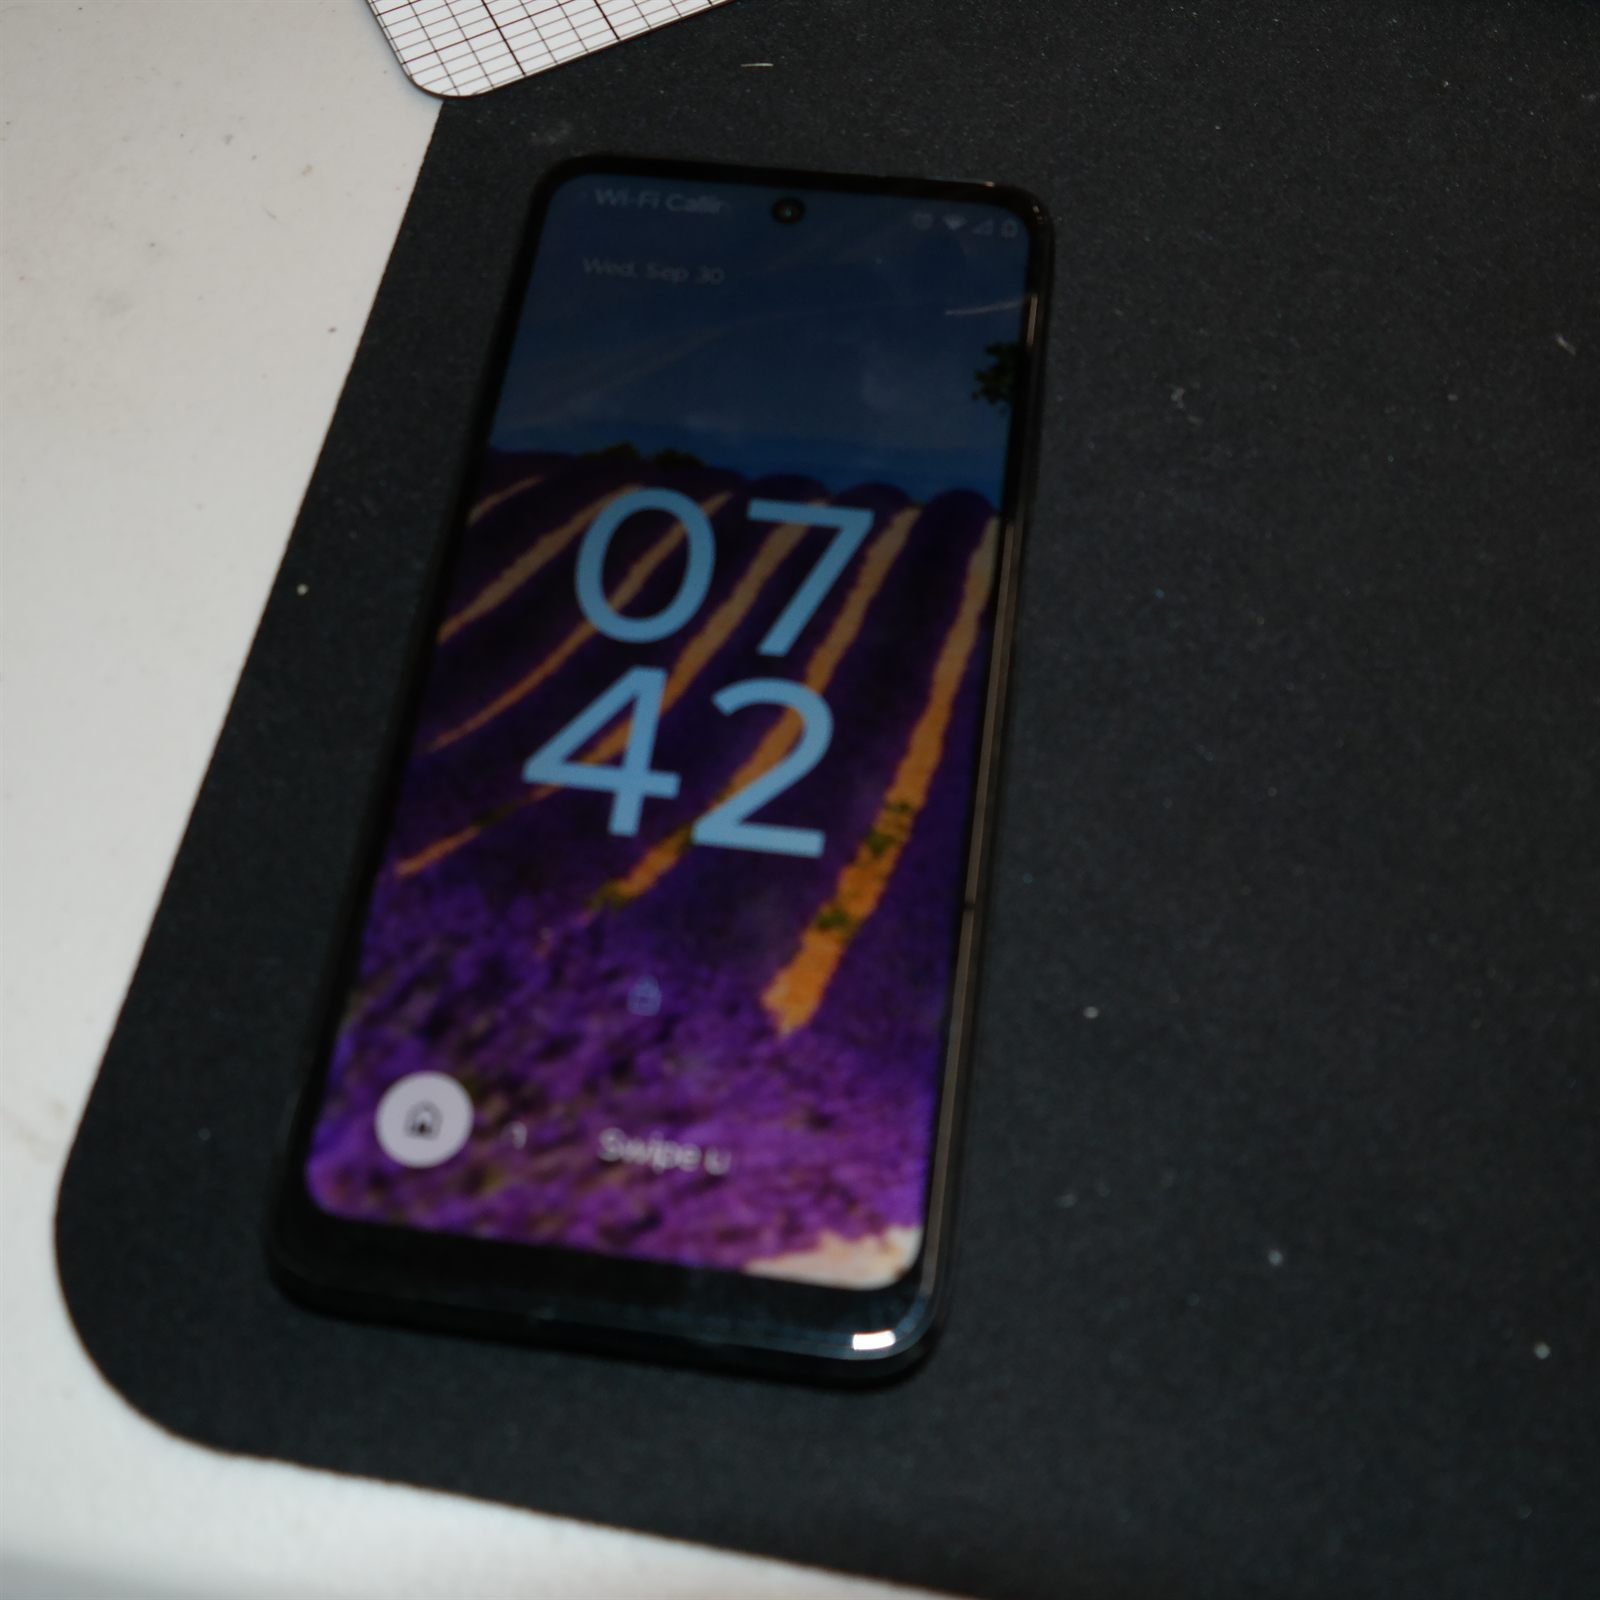
The phone powered on normally after reassembly and came up to its lock screen. The rear cover returned to its proper position against the frame, with the internal pressure from the failed battery gone.
The result was not a newer phone and not an unnecessary replacement device. It was the same phone, back in service, with the part that had failed replaced. The swollen cell was handled as damaged lithium: not curbside, not shipped.
After a Battery Replacement: Calibrate the Gauge
A phone doesn't measure its charge level directly. A small fuel-gauge chip estimates it, and it learns where "full" and "empty" actually sit from the cell it has been living with. Put a new battery in and those reference points still describe the old, worn-out one, so for the first few days the percentage can read oddly: dropping in jumps, sitting at a number too long, or shutting down with charge apparently left.
Calibrating resets those anchors. iFixit's Battery Calibration guide gives the procedure for a phone: charge to 100% and leave it charging a further two hours, use it until it shuts itself off, then charge it uninterrupted back to 100%. That's worth doing once after any battery replacement, and it's something you can do yourself at home.
Be clear about what it is, though. Calibration corrects the readout, not the battery. It won't add capacity, extend runtime, or improve a cell's health, and a gauge will generally re-learn on its own over a few ordinary charge cycles. The calibration pass just gets it there in one go instead of over a week of guessing.
What This Job Shows About How We Work
A lifting screen or rear cover is a symptom, not the fault.
Closing the gap would have hidden the warning while putting more pressure on the failed cell. The cause had to be addressed from inside the phone.
Identification comes before ordering.
A familiar product name is not a part number. The exact model family and the battery's compatibility were established before the replacement was bought.
Access is part of the repair.
The battery was the failed component, but reaching it meant protecting the display seam, the power-button cable, its bracket, several press connectors and the motherboard cover. A successful repair doesn't create another fault on the way in.
Slow pressure beats brute force.
The adhesive did eventually release. Forcing it would only have raised the chance of puncturing the cell or damaging the display underneath.
A replacement isn't finished until the device is tested.
The final power-on check confirmed the phone had survived disassembly and reassembly and was ready to go back into service.
Technical Details
| Device | Motorola Moto G 5G (2022) |
| Model family | XT2213 |
| Reported symptom | Rear cover separating from the frame along one side, getting worse, with no broken cover or clips |
| Failed component | Original lithium-ion pouch cell, swollen |
| Battery model | JK50 |
| Original cell markings | Rated capacity 4850 mAh at 3.85 V; date code DC20211102. The model line itself is covered by tape in every photograph, so it was not read directly off the old cell |
| Replacement | Genuine Motorola JK50, label reading MODEL: JK50, 4850 mAh, 3.85 V |
| Additional risk | Power-button cable stays attached between the rear cover and the phone, so the cover opens like a book rather than lifting off |
| Wrong-seam hazard | Two seams run around the edge. Prying the display seam instead of the rear-cover seam turns a battery job into a display replacement |
| Removal method | Battery disconnected first, then the cell released from its adhesive with plastic tools and slow, steady pressure. No metal levers, no puncture, no sharp bending |
| Verification | Phone powered on normally to its lock screen; rear cover returned to its proper fit against the frame |
| Aftercare | Calibrate the fuel gauge once after the swap — charge to 100%, keep charging two more hours, run it down until it shuts off, then charge uninterrupted to 100%. Corrects the percentage readout only; it does not change capacity or battery health |
| Battery disposal | Swollen cell handled as damaged lithium — not curbside, not shipped |
| Status | Complete. Battery replaced, phone reassembled, tested and back in service |
Technical References
This repair was planned with the model-specific iFixit Motorola Moto G 5G (2022) Battery Replacement guide, which documents the seam warning, the attached power-button cable, and the instruction to use slow, consistent pressure on the battery adhesive. It was compared against this Moto G 5G (2022) battery-replacement video before work began. The guide also calls for heat and isopropyl alcohol on the adhesive; those are its documented method, not a claim about what was used here, which was plastic tools and patience.
The calibration procedure above is iFixit's Battery Calibration wiki, which states that all newly installed smart batteries should be calibrated as soon as possible and that the process corrects the reported percentage rather than the battery itself. That page also suggests repeating it monthly; we don't pass that part on, because running a lithium cell down to shutdown every month is harder on it than ordinary partial charging.
Battery Swelling? Stop Charging It.
If a phone, tablet or laptop has started separating at the screen or the rear cover, rocks on a flat surface, runs unusually hot, or shows visible swelling, stop using and charging it. Don't press the case closed, and don't puncture the battery to make it fit.
Battery and screen replacement are the two phone repairs we do most. We identify the device, source the correct part, do the work, test the result and handle the failed cell appropriately. Send the make and model when you get in touch, because parts availability for your specific model is usually what decides it; water damage and board-level faults are looked at case by case. See what we repair, what diagnosis and repair cost, and where we go before you book.
Not sure it's worth fixing? Tell us the make, model, and what it's doing, or call (509) 708-2953 — no charge to ask, and nothing to book. Send us the details →
That conversation can usually tell you whether a repair is worth pursuing and which diagnostic fits. A firm repair price takes having the device in hand.
No transport charge if you drop it off in Leavenworth yourself, though the $50 diagnostic still applies. Pickup and return is $20 in the Wenatchee Valley corridor, $40 outlying areas, one fee both directions.